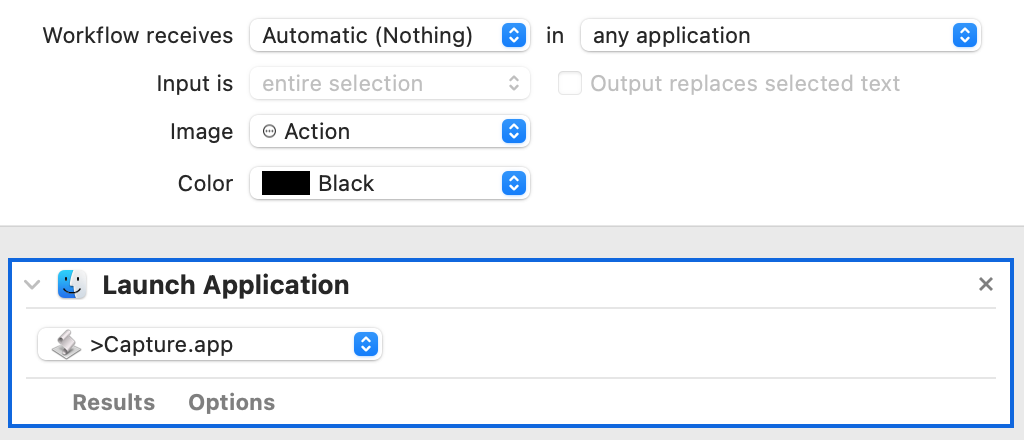
Fast forward to 2023...
Most of what I wrote below is correct. But unless you have lots of time on your hands (or work on very difficult recordings), I would strongly suggest that you use Whisper, the OpenAI solution to automatic transcription. It requires basic command line skills, but nothing that you can’t learn in a 10-minute video tutorial. Your machine specs will also make a difference: my 2.8 GHz Quad-Core Intel Core i7 2015 MBP with 16gb of RAM requires about 1.5~2x the length of the soundtrack to produce a very good transcription (of Japanese interviews) that I will later have to edit to produce something useable.
The github page is here: openai/whisper, and includes plenty of links that you might want to read.
About 4 years ago I got a job where I needed to transcribe about 40 hours of interviews. I wrote most of this article then and let it to rest until now. The solution I propose is a workable solution for transcribing audio/video and can also can be used as a practical introduction to Applescript. I just tested everything in High Sierra, with the current versions of all the mentioned applications.
This article also demonstrates how a few macOS technologies can be put together to create a very robust and integrated solution in a number of very easy steps. The idea is:
- Find a process that you need to automate
- Use Applescript to code the automation
- Use Automator to create a system-wide service to access the automation
- Use System Preferences to assign a shortcut to the service, either available system-wide, or only in a given application
Step 3. and 4. are just one way to access the automation. There are many other ways.
Update (the day after...): a
comment on reddit says that the title is not accurate because I do not propose speech recognition. For people not familiar with transcription, plain speech recognition is not a solution because it requires two things: good sound quality and that the software be used to the voice. That is not the case with most transcription situations. But, it is possible to dictate the audio that you are listening to, in which case you'll need the same tools as described here, and you just have to add macOS dictation to the workflow if you want to stick to macOS bundled software.
Homemade transcription software...
Transcribing 40 hours of interviews is a lot of time in front of the machine and even though the only thing you need is a text editor and an audio file player the lack of default integration between the two can make you waste a lot of time on tedious manipulations.
The problem is going from the text editor to the audio player each time you need to pause the stream, step backward, or start the stream again. Then you need to get the Time Code, write it at the beginning of the line and start transcribing again.
There seems to be plenty of professional solutions for this where you can start/pause/rewind the audio player with foot pedals directly from the text editor.
However, if you’re used to your keyboard, doing that directly from the text editor of your choice using shortcuts and without ever leaving the editor would also be a totally satisfying solution.
It is possible to use the media buttons available on your keyboard (except for inserting the Time Code). You can work in the editor and pause/resume and do a few other things directly with the keys that Apple has provided. Although, There are a few problems with that.
The first is that you may have set your keyboard to ignore the Apple supplied keys and directly access the Function keys instead. If you’ve done that, you’ll have to hit the fn key and the corresponding Function key to access the media function you need.
Another problem is that the media keys are not conveniently located on the keyboard. Accessing them often will require that you move your hand from your basic typing position and this will slow you down.
The last and most important problem is that you can’t easily and precisely rewind the file to go back to a moment you did not properly hear…
The media buttons are really made to easily play media, and not to do transcription, so we need a different solution.
One solution would be to have direct access to the appropriate functions of the media player while it runs in the background through shortcut keys while the text editor remains in the foreground.
Here is what I came up with, using the following bundled software/solutions:
- TextEdit
- QuickTime Player
- Applescript / Script Editor
- Automator
- System Preferences
TextEdit will be used to type the text. It comes with everything you need to write plain text and you can also use it as a minimalist word processor. You can use anything else as a replacement. The only condition is that the software you use supports macOS Services. Unless you use a very exotic text editor or a virtual environment, that should not be an issue.
QuickTime Player supports a number of audio file formats and its functions can be accessed through Applescript. In the second part of this article I'll use VNC instead because it is more convenient.
Applescript is the Apple solution to link all the applications together. Script Editor is the Apple bundled editor where you can code in Applescript.
Automator is how we will create the “Services” to send commands to QuickTime Player while working in TextEdit.
System Preferences will allow us to assign a shortcut to access the services we just created.
Quicktime Player and Applescript
First of all, we need to play a document in QuickTime Player. Instead of pressing the Play button every time we want to start QuickTime Player, we're going to automate that with AppleScript.
1) Open Script Editor
2) Select File > Open Dictionary, then select QuickTime Player from the list of applications that is displayed
What you see now is the list of QuickTime Player functions that you can access from Applescript. You’ll notice a “QuickTime Player Suite” where player specific functions are documented. There, you can see that the “play” command requires a “document” to run.
3) Select File > New and type the following command:
tell application "QuickTime Player" to play front document
Now, open an audio file with QuickTime Player (do not start playing it yet), go back to your script and click the “Run” button in the Script Editor window (the grey arrow pointing right in the toolbar). You should now see the QuickTime Player start playing your file.
Pretty cool right?
If we just replaced clicking on "Play" in QuickTime Player by clicking on "Run" in Script Editor, we would not have advanced much. We now need to package all that in a way that removes the need to click on a button.
Automator
4) Open Automator and select File > New. Select “Service” and in the search field on the left, above the list of possible actions, enter “Applescript”. You should end up with the command “Run AppleScript”.
5) Drag that command to the right side of the Automator panel. You can now see a “(* Your script goes here *)” where you paste what you just typed in the AppleScript Editor (“tell application "QuickTime Player" to play front document”).
6) Now, there are a few things you need to tweak to make that run properly. Above the command block you just created there is a “Service receives selected [text]” drop menu. Click on [text] and go down the list to select [no input]. Indeed, your code does not need any input to run, so [no input] is the right choice. Leave the “in [any application]” as is since you want to be able to use that service from any application that supports services, not only from TextEdit.
We’re almost done. Once you save the service (give it a name like “QuickTime Play” or anything that makes sense to you), it should appear in the “Services” menu that’s available from the Application menu next to the Apple menu (top left of the screen).
So, the service is available, you can work in your text editor and select it from the menu and it will play the front QuickTime Player document, but just like you want to avoid having to click around, you want to access that service by using a keyboard shortcut so that you don’t have to leave the keyboard while typing.
System Preferences and Services shortcuts
7) At the bottom of the Services menu you’ll find a “Services Preferences” item. Select it and you’ll find yourself in the Keyboard Shortcut section of the System Preferences. Down at the bottom of the list, in the “General” section, you’ll find your newly created service with an “add shortcut” button on the right. Click that button and enter the shortcut you want, but be careful not to use something that’s already used in your text editor. The best way to check that is to open a file in your text editor and to try the shortcut you’re thinking about in various contexts (on selected text, between letters, etc.) If nothing happens, it means you can assign it to the service.
8) Enter TextEdit or the editor you're working with and hit the shortcut. Your audio file should be playing in the background, and you have not left the editor.
After "Play": "Pause" and "Rewind"
We have created a “Play” service. Now we need to have a “Pause” service and a “Rewind” one. The only difference is the AppleScript command that we’ll use.
If the “Play” command was:
tell application "QuickTime Player" to play front document
the “Pause” command will be:
tell application "QuickTime Player" to pause front document
and the “Rewind” command (let’s say 5 seconds backward) will be:
tell application "QuickTime Player" to step backward front document by 20
The “20” is 20 “steps” and after testing a bit it seems that one step is 1/4 of a second, so 5 seconds will be 20 steps.
We seem to be almost done, but there are 2 problems with the above commands.
1) The Rewind command also pauses the file. But if you want to step backward to re-listen a part you did not hear clearly, you want to have the command resume play right after you’ve rewound the file. The solution is, well, to ask QuickTime Player to resume playing after rewinding the file... The new “Rewind” command would look like this:
tell application "QuickTime Player"
step backward front document by 20
play front document
end tell
2) You’ll notice that there is a small time difference between the time you pause and the time you resume the play. Depending of when you stop and resume the playing, the time lag seems to vary between a few hundredth and a few tenths of second. It seems that’s the way QuickTime works and that’s a problem if you need to resume playing when somebody is talking: a 0.2 to 0.3 second gap is enough to miss a sound and misunderstand a word. Now that we know that “step backward” pauses the file, we can use it to pause the file at a satisfying time position, like 2 step before QuickTime Player actually paused (that should be enough). The new “Pause” command would now loo like this:
tell application "QuickTime Player" to step backward front document by 2
We already have a Service and a shortcut to access “Play”, so we just need to follow the same procedure to create the “Pause” and the “Rewind” services.
Now we can start working on our files…
Time codes...
But what about inserting time codes in your document ?
Here is the code from which you’ll be able to create your own service:
tell application "QuickTime Player" to set QTPTIME to (current time of front document)
set MIN to (QTPTIME div 60 as integer)
set SEC to (QTPTIME - (MIN * 60) as integer)
if MIN < 10 then set MIN to 0 & MIN
if SEC < 10 then set SEC to 0 & SEC
set TC to (("TC: " & MIN & ":" & SEC) as text)
set the clipboard to (TC as text)
“current time” is the current time of the document being played. The value is given in seconds. So to convert that into a time code we need some basic arithmetics, which we find in line 2 and 3.
The results are expressed as “normal” numbers and so, for numbers smaller than 10 we’ll need to add a “0” to the number so that the time code has always 2 digits, like “01:01” for “1 minute 1 second”. That is in line 4 and 5.
Then we need to create the time code strings, on line 6. The concatenation command is “&” as we saw in line 4 and 5.
The resulting string that is put into the clipboard would be something like:
TC: 01:01
The last line stores the time code into the OS clipboard so that you can paste it wherever (and whenever) you want in your document. You can use the standard Command+V shortcut to do so.
Now, if you’ve done everything right, you should have something like this in your Services menu:
Et voilà !
An strong alternative to QuickTime Player: VLC
There is an alternative to QuickTime Player that has none of the problems we just described. The software is VLC. It is
Free Software and is available directly from the
development site. You can
make donations to contribute to the development too.
VLC can play a lot of media formats. If you open VLC’s AppleScript dictionary (step 2. above) you’ll see that the “play” command works on the current playlist item and also pauses the stream when it is running. Trying VLC, you can see that when it pauses, it resumes from the same position, so that you don’t have to think of a workaround like we did for the above “Pause” service. Also, the “step backward” command does not stop the stream. If the stream is playing then “step backward” just steps backward and proceeds with playing the file. If the file is paused, then stepping back will keep it paused.
Thanks to VLC’s behaviour we can reduce our 3 above scripts to 2. One would be “play/pause”, the other would be “Step backward”.
The code looks like that:
Play/Pause:
tell application "VLC" to play
Step Backward:
tell application "VLC" to step backward of 2
(the default is 10 seconds, the AppleScript dictionary gives 4 possible values which are, after testing “of 1” for 3 seconds, “of 2” for 10 seconds, “of 3 for 1 minute” and “of 4” for 5 minutes.
VLC makes it simpler to code the solution, but if you want to work only with macOS bundled software, it is also possible to work around QuickTime Player issues, as we've seen above.
There are a lot of areas where the above code can be improved, but the solutions we have work well enough and can be the basis for a lot of other relatively simple developments.
Update (11/9):
I've changed the code a bit after testing on a real job (in VLC).
First, the time code:
tell application "VLC" to set VLCTIME to (current time as integer)
set MIN to (VLCTIME div 60 as integer)
set SEC to (VLCTIME - (MIN * 60) as integer)
if MIN < 10 then set MIN to 0 & MIN
if SEC < 10 then set SEC to 0 & SEC
set TC to (("
" & "TC: " & MIN & ":" & SEC & "
") as text)
set TCstring to (TC as text)
return TCstring
What I changed here is the TC string: I added a line break at the beginning and at the end of the TC string, so that I don't have to insert them myself. That way, I can insert the time code at the end of any line I've just finished and I get
- a line break → move to the next line
- a time code → insert the time code
- another line break → move to the next line
so that I can start to type right away.
I have changed the way the Automator service works too. Instead of feeding the clipboard, and pasting the time code myself, I ask the code to return the string (
return TCstring) and I checked the [Output replaces selected text] box at the top of the Automator actions list.
That way the returned value is automatically pasted where I have the cursor.
Another modification, minor this one, in the
Step Backward function: I changed the delay from 2 to 1, which is in fact way enough when you just need to clarify a sound. A delay of 2 requires that you wait too long before you can resume typing.
tell application "VLC" to step backward of 1
Now, you must really be careful about the shortcuts so that the don't interfere with normal navigation in the text.
I chose the following:
Control + ] for "VLC Play+Pause"
Control + [ for "VLC Rewind"
Control + ↓ for "VLC Time Code"
I've just finished transcribing a short 6 minutes interview with this setting and everything worked like a charm.